8×10 Pergola Plans – Created to pair with the Solace Pergola System and Hanging Rope System, the Solace Japonica Cedar Wood Pergola Kit comes with instructions, lumber, and hardware. A cedar plank deck is a great outdoor improvement project for you, either you or your home contractor. Japanese cedar is naturally strong, light, weather-resistant and rot-resistant. However, like any natural wood, proper care and maintenance will extend the life of the Solace Cedar Pergola
We do not have any measurements other than the measurements you see on the website. Open buildings are designed as a package, so we can keep our prices down. Additionally, we don’t have the inventory space to store different sizes, and keeping our sizes consistent makes shipping easier.
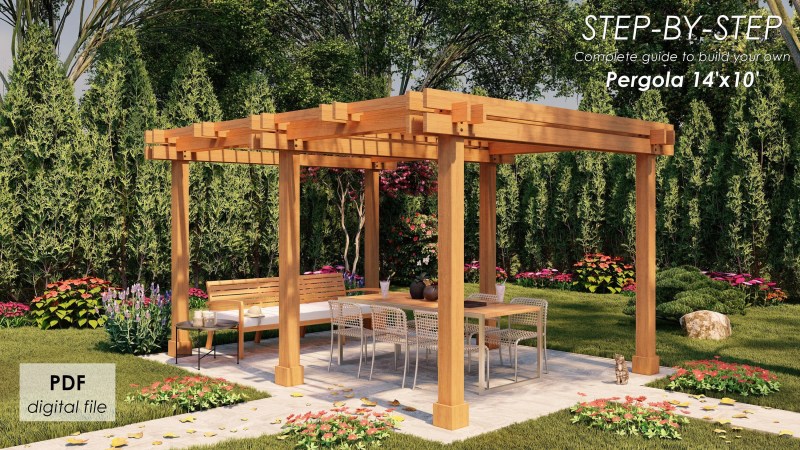
8×10 Pergola Plans

Installing a grass frame is not recommended due to the build-up and wear of the wood. We recommend that you use a concrete bed, crushed stone, or footings placed under the columns to ensure that the building is level.
Pergola Plans 8 X 10
“Splits” and “checks”, as they are commonly referred to in the industry, are a common and unavoidable part of owning an outdoor product made in the south of pressure treated yellow.

“Checking” is defined as the separation of wood, usually through the rings of the wood, and is the result of seasoning. “Splits” and “checks” are part of the nature of wood and are an inevitable part of the drying process.
What often happens is when you pick up your frame and install it, you may notice a nice finish and smooth wood. That’s because we keep most of our good ovens dry and tidy, the grill wood inside and away from rain and excess moisture. However, when your restoration structure is exposed to the outside, such as moisture, rain and sun, the external influences begin to interact with the wood and the moisture begins to change.

Pergola Kits: The Ultimate Buying Guide
As a result of the change in humidity, “checks” and “splits” begin to occur because the surface of the lumbar part dries and shrinks faster than the inside. The center of the wood, swollen with moisture, holds firm, and the shrinking exterior expands and splits. Although the aesthetic issue of “checking” rarely reduces the service life of properly treated wood. Often, when the mail or wool is dried to an even amount of moisture throughout the board, the “checks” and “splits” will decrease in size or disappear over time.
When the check happens, grab the dirt provided in your structure and tap the open wood in a “check” or “split”. By protecting all exposed wood surfaces, this will help your structure look its best and protect the newly exposed wood.

Just know that this is simply the nature of wood and will add character to the structure. Modern lines, and a lot of shade for those who have a lot of sun! Take the guesswork out of installing your pergola with these ready-to-use plans! Shop with confidence with our 30-day risk-free money-back guarantee!
8 Ft. X 12 Ft. White Aluminum Manual Pergola
This pergola covers an area of 8 feet x 10 feet, which means that the contours of the top arrangement will remain the same as your lawn. The posts are spaced to be 5 feet x 7 feet on the outside of the post. Scroll down for more details

These digital plans include detailed installation instructions and a materials list to build your own 8 ft x 10 ft pergola. These detailed plans are in imperial units (feet and inches). The following are included with your purchase:
Once your order has been placed, you will receive an email with a link to download the plans. The plans are in Adobe Portable Document Format (PDF) files, included in a single ZIP document. See the following website for instructions on using .zip files. You probably already have a PDF reader installed on your computer, but if not, you can use the free Adobe Reader program to view the plans.

8×10 Gazebo Plans
Please see the FAQ if you have any questions. Alternatively, if you have any issues with the plans, please contact us. This step by step DIY project is about 8×10 pergola plans. If you need a small shady spot in the garden, I’ve got you covered with free plans and step-by-step instructions. This pergola rests on a solid 6×6 frame. You can adjust the distance between the rafters to create more or less shade. Check out the rest of my woodworking plans if you want more building inspiration.
All my woodworking plans come with 3D diagrams and step-by-step instructions. In addition, the plans include complete cutting and shopping lists. Remember to read local codes before starting the project. It is your responsibility to modify and comply with legal requirements.

When buying wood, you must carefully choose the wood, making sure that it is straight and without visible defects (cracks, knots, distortion, decay). Investing in cedar or other weather-resistant wood is a good idea, as it will pay off in the long run. Use a spirit level to plumb and fix the parts, before inserting the galvanized screws, otherwise the project will not have a smooth appearance. If you have all the tools and equipment needed for the project, you can complete the job in a day. See all my Premium plans here.
Diy Building/installing A Pergola Using Salvaged Lumber
The first step in a pergola project is designing the posts. Use foam boards and string to organize the post. Apply the 3-4-5 rule to each corner, then measure the edges to make sure they are perfectly aligned. You need to change until you get the desired result. As you can see in the photo, this pergola has an 8×10 base.

There are several ways to fasten the 6×6 openings. You can attach the posts to the concrete or use adjustable anchors and drop them into the footings. Dig the holes 3′ deep (or below the front row) and about 12-13″ in diameter. Place a layer of gravel in the bottom of the holes and then place the pipe forms. Insert the posts, straighten and level them. Fill the forms with concrete, while If you use anchors, you should straighten them and set them in place posts after the concrete has dried, using a lag screw.
Smart tip: Read local building codes so you can dig holes to the proper depth. For this project, we will assume that you will be using post fasteners, so if you are installing concrete posts, be sure to add 3′ to the post size.

10×10 Diy Freestanding Garden Pergola Plans
Make sure the posts are level and use a circular saw to fix them. Note the temporary braces holding the posts together.
You can add more value to your pergola by cutting decorative trim on both ends of the wood. Use a circular saw for straight cuts and a jigsaw for curved pieces.

Place the lights on the posts and use a spirit level to make sure they are perfectly level. Attach the beams to the posts and drill pilot holes. Insert the 9-inch screws to secure everything. Use washers on both poles.
Artisan Wooden Pergola
Use 2×8 lumber for the support beams as well. Make decorative cuts on both ends of the tree, using the pattern above.

Attach the pergola beams, flush with the base beams. Center the joists on top of the posts, leaving a 12-inch overhang on either side. Drill pilot holes through the joists and posts and insert the 9-inch drive screws.
Next, use the 2×6 wood to make the hair. As you can see in the plans, you need to make several places for the beams to connect the support beams. Make parallel incisions in the marked areas and then remove the excess using a spatula.

8′ X 10′ Wooden Pergola
Use a jigsaw to cut the curve at both ends of the posts. Use a circular saw for straight cuts.
Attach it to the roof in the form of a pergola. Spread the axle evenly, as shown in the diagram. Use rafters or just drill pilot holes and insert 5 1/2″ screws to secure the rafters to the support beams.

Also, use 6 × 6 wood for bracing. Use a miter saw to make a 45 degree cut on both ends of the pieces. Get a jigsaw to make curved pieces that will enhance the look of your patio pergola. These brackets will strengthen the structure of the pergola and make it more stable in strong winds.
Ozco Building Products Project #287 Kit — 8×10 Pergola In Ironwood
Next, use a spirit level to level the posts and then place the straps in place, as shown in the diagram. Drill pilot holes and insert 5 1/2″ screws to hold the brackets firmly in place.

Attach the 1×2 strips to the top of the trellis. Lay these beds evenly for professional results. Center the rafters and then drill pilot holes before inserting the 1 5/8″ screws. If installed correctly, these steps will hold the rafters evenly spaced.
8×10 pergola, pergola and deck plans, 8×10 wood pergola, 8×10 pergola kit, pergola build plans, 8×10 pergola canopy, 8×10 metal pergola, pergola plans 8×10, pergola kits 8×10, 8×10 aluminum pergola, 8×10 pergola home depot, 8×10 vinyl pergola
Leave a Reply